Support Takeover Guide
Support Takeover lets hotel staff assist guests in real-time via video call during self-service check-in. While connected, staff can override verification steps and payments on behalf of a guest who needs help.
Overview
The Support Takeover flow works like this:
- A guest starts check-in on a kiosk or mobile device
- The guest encounters a step they cannot complete (e.g., document upload fails, payment issue)
- The guest taps the phone icon or the "Need a hand?" prompt to start a video call
- A staff member receives the call in the Command Center and connects
- While on the call, the staff member can perform overrides to complete steps on the guest's behalf
- The guest's check-in page updates automatically as each override is applied
- Once all steps are resolved, the guest is checked in and receives their room assignment
Call activity also appears in the audit trail inside Command Center. Use it to review who answered and when the call ended.
Overrides can only be submitted while a video call is actively connected. If the call disconnects, override buttons stay disabled until a new connection is established. The buttons re-enable automatically when the connected call returns.
Prerequisites
Before using Support Takeover, ensure:
- Video Calling is enabled for your property
- Go to Settings → Communications → Video Call in the Streamliner dashboard
- Confirm the status shows as Enabled (see Video Call Settings)
- If Operating hours are enabled, guests can only start calls during open windows
- You are logged into the Command Center
- Navigate to the Check-Ins page via the left sidebar
- The video call receiver widget loads automatically in the background
- Push notifications are enabled in your browser
- You will receive a push notification when a guest initiates a video call
- The notification title will read "Incoming Video Call"
- You may also hear a ringtone for the incoming call alert
Guest Experience
Understanding what the guest sees helps you guide them during the call.
Starting Check-In
-
Guest opens the check-in page and enters their confirmation number (last 4 characters)
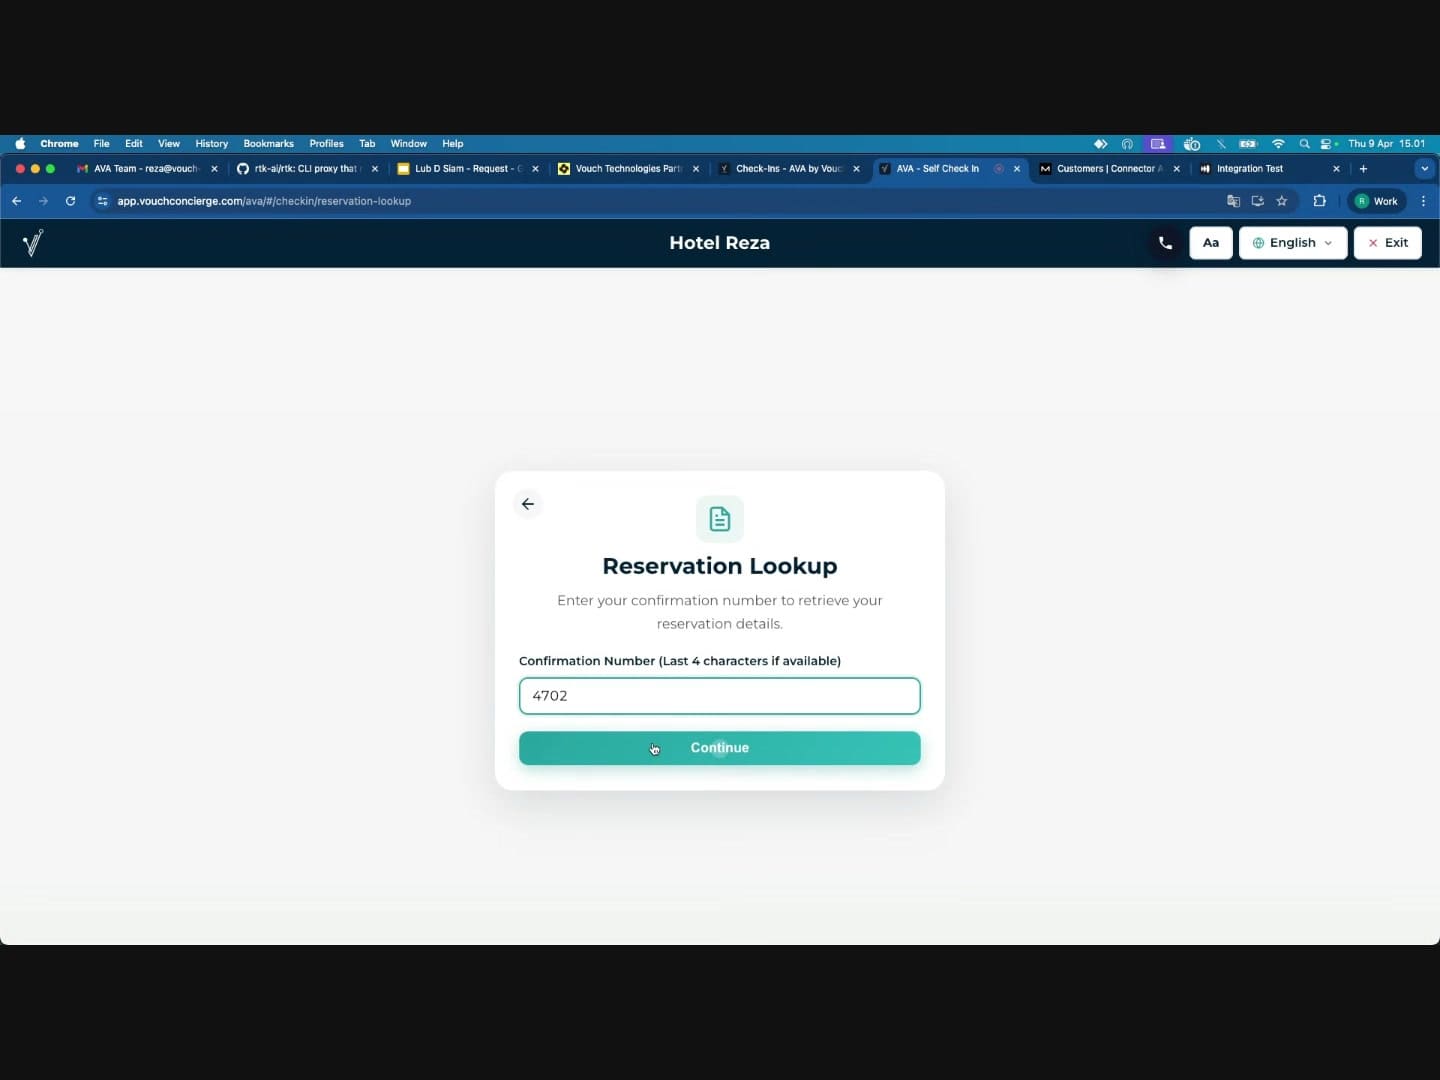
-
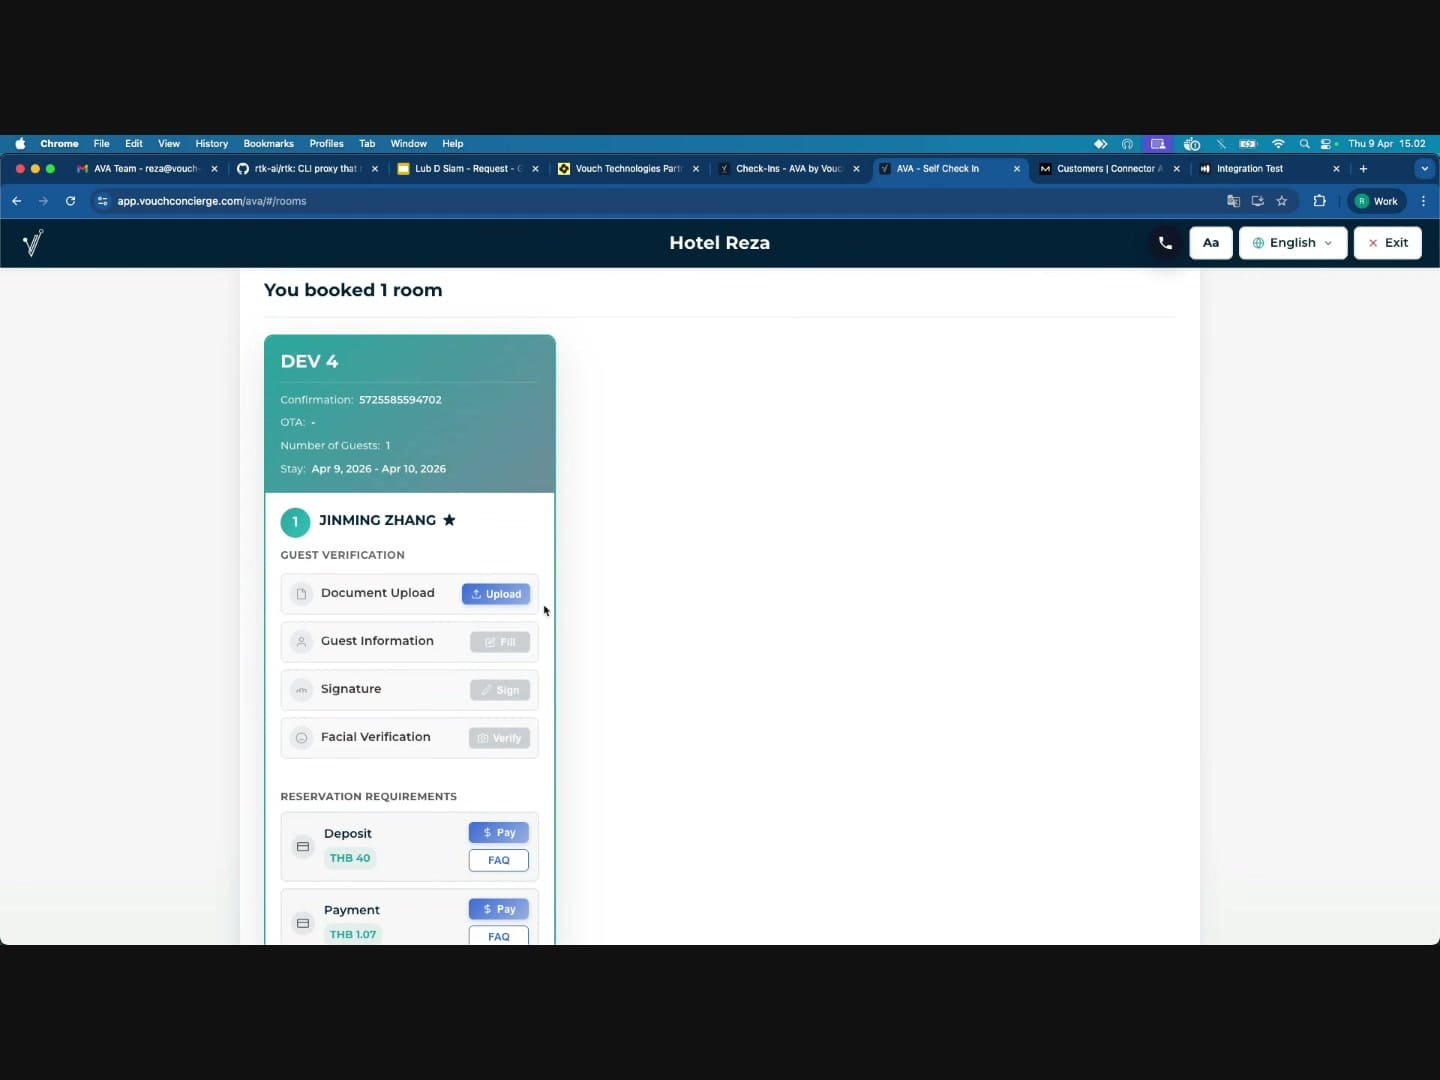
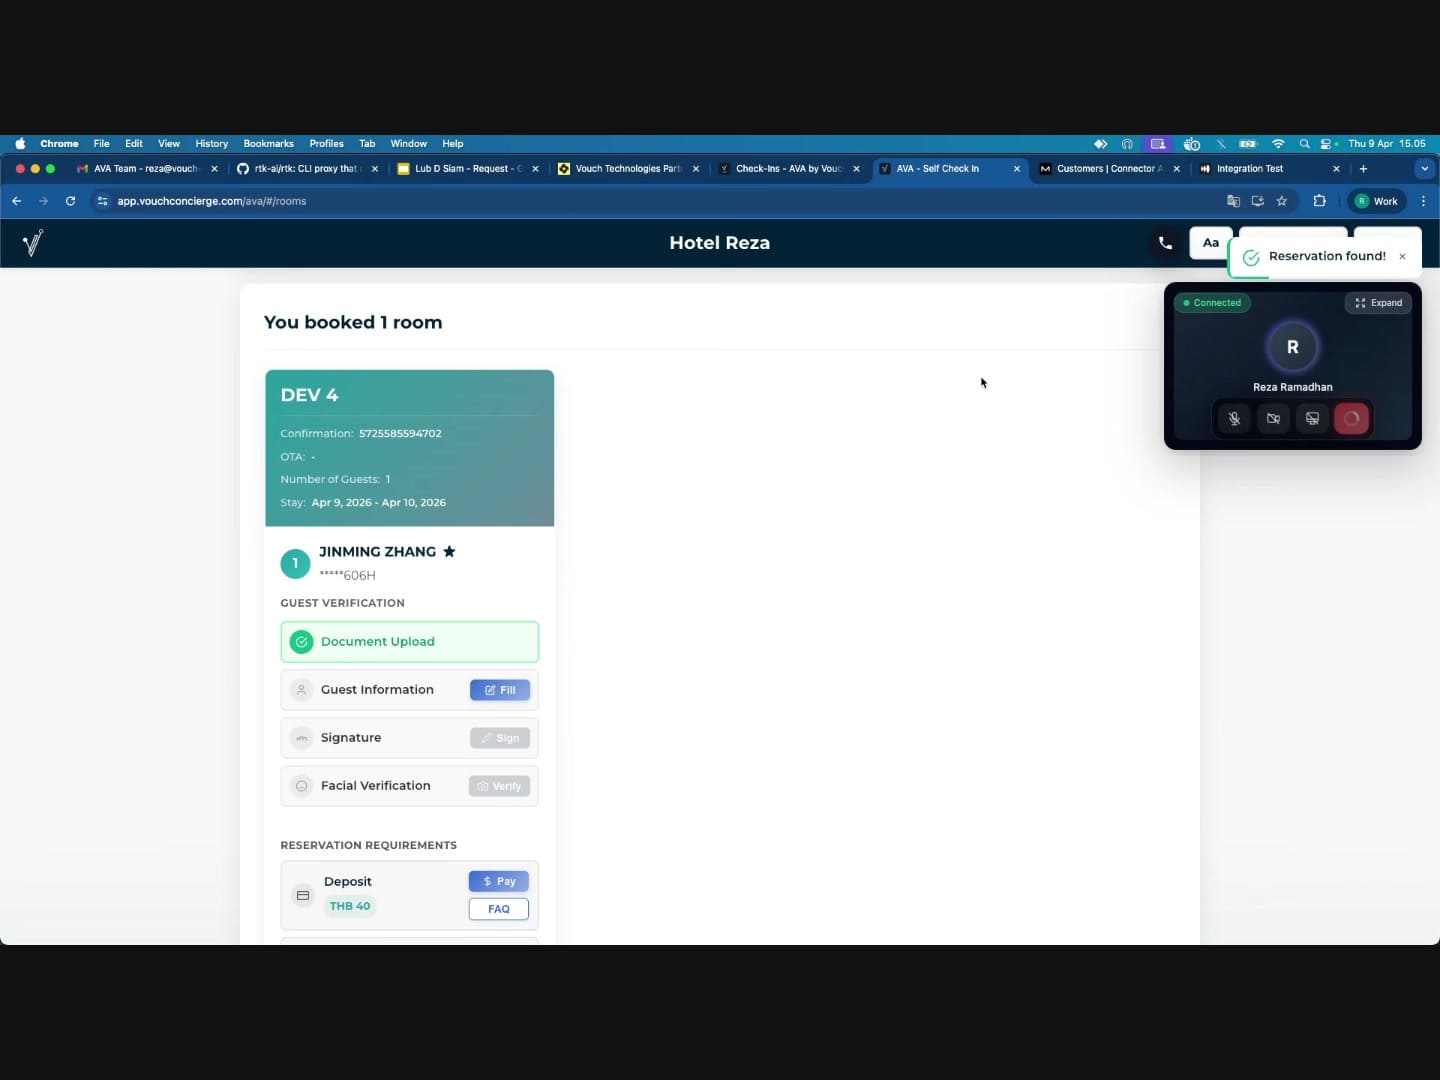
After clicking Continue, their reservation loads showing:
- Room details (room name, confirmation number, stay dates, number of guests)
- Guest Verification steps: Document Upload, Guest Information, Signature, Facial Verification
- Reservation Requirements: Deposit and Payment amounts
Requesting Support
The guest can request help in two ways:
-
Phone icon in the top header bar -- tapping this initiates a video call immediately
-
"Need a hand?" prompt -- a floating widget that appears in the top-right corner offering to start a quick video call with the hotel team. The guest taps "Start Video Call"
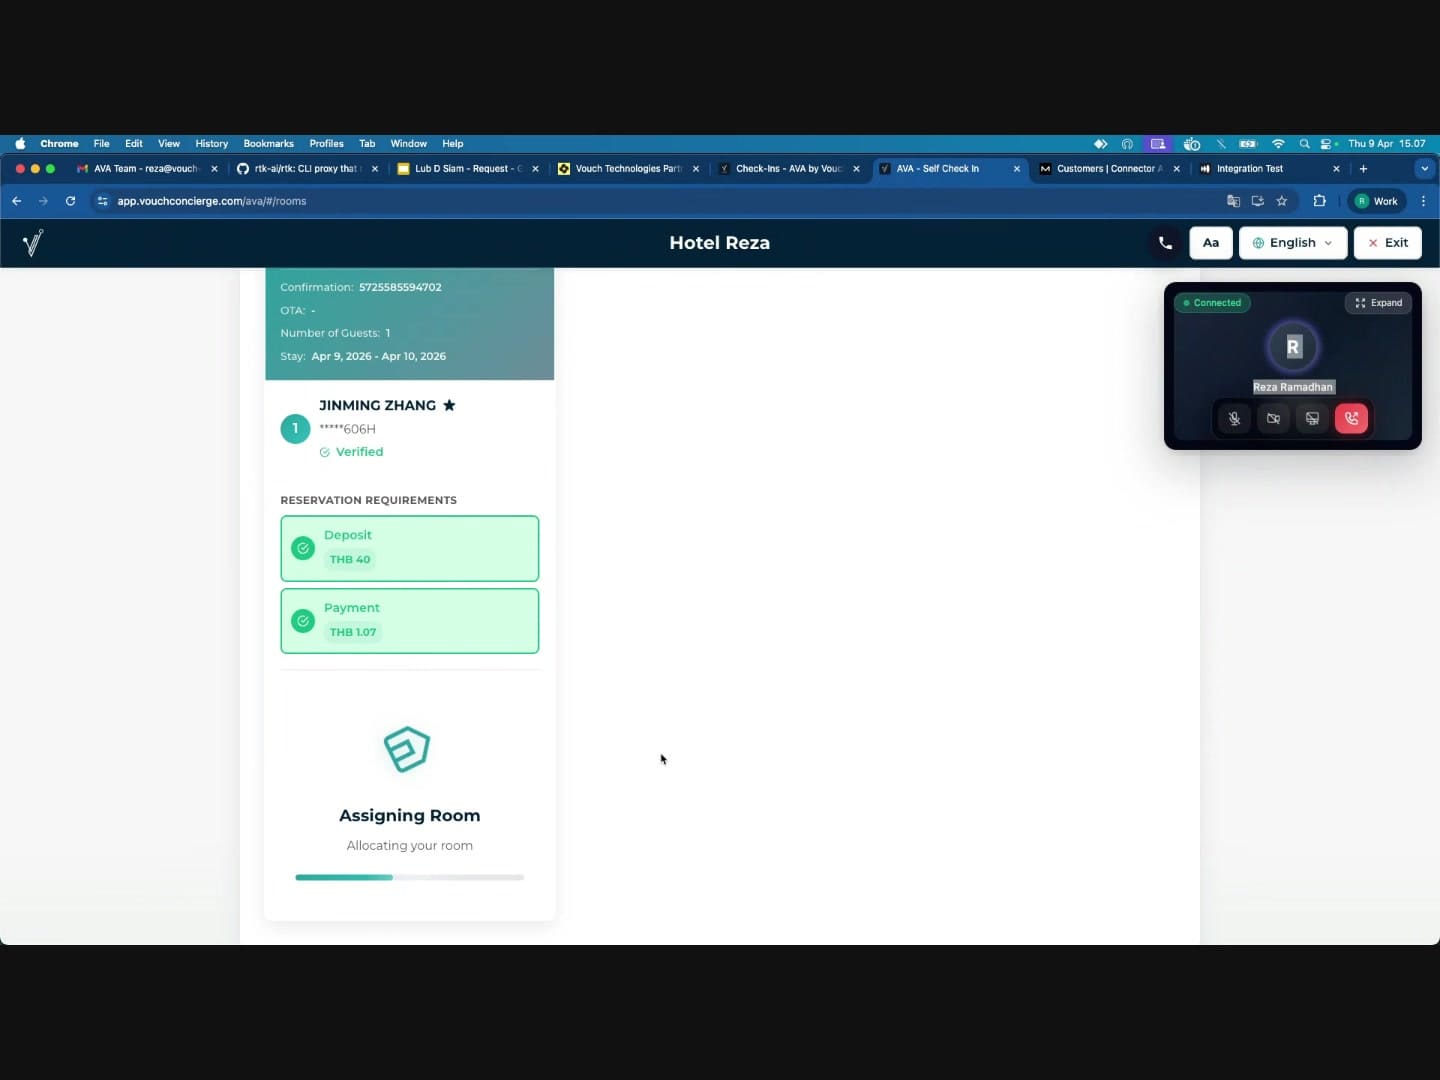
During the Call
-
A call widget appears showing the connected staff member's name and a green "Connected" indicator
-
The widget has controls for mute, camera, screen share, and ending the call

-
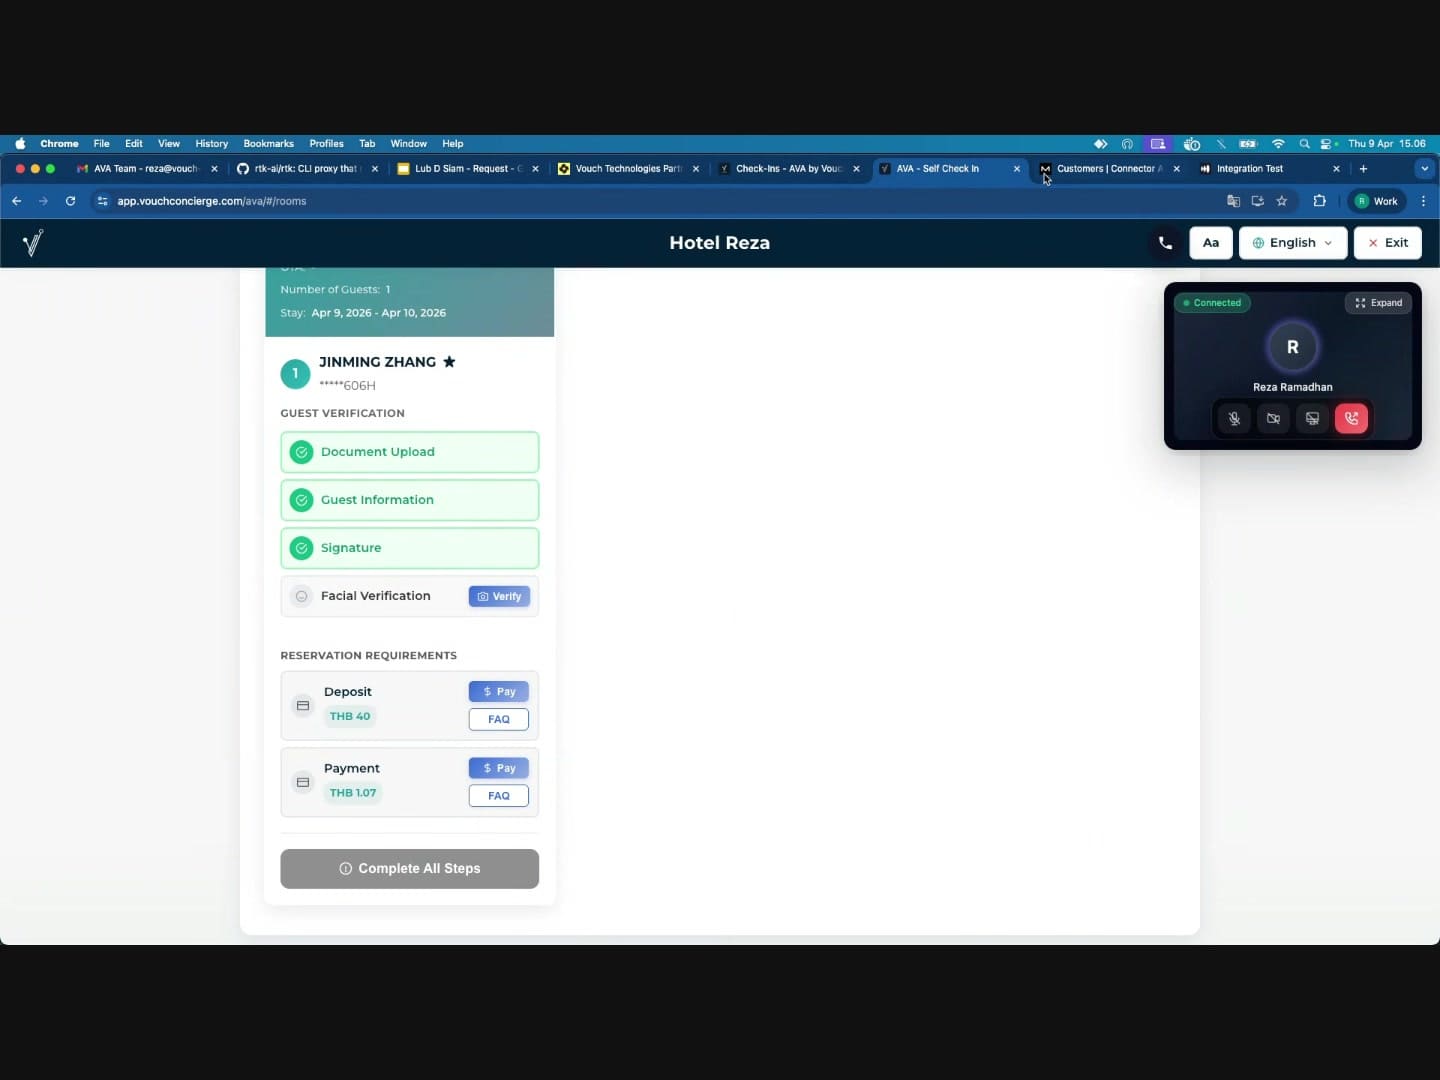
As the staff applies overrides, the guest's check-in steps automatically update:
- Pending steps show action buttons (e.g., "Upload", "Fill", "Sign", "Verify", "Pay")
- Completed steps turn green with a checkmark
- Once all verification steps are green, the guest status changes to "Verified"
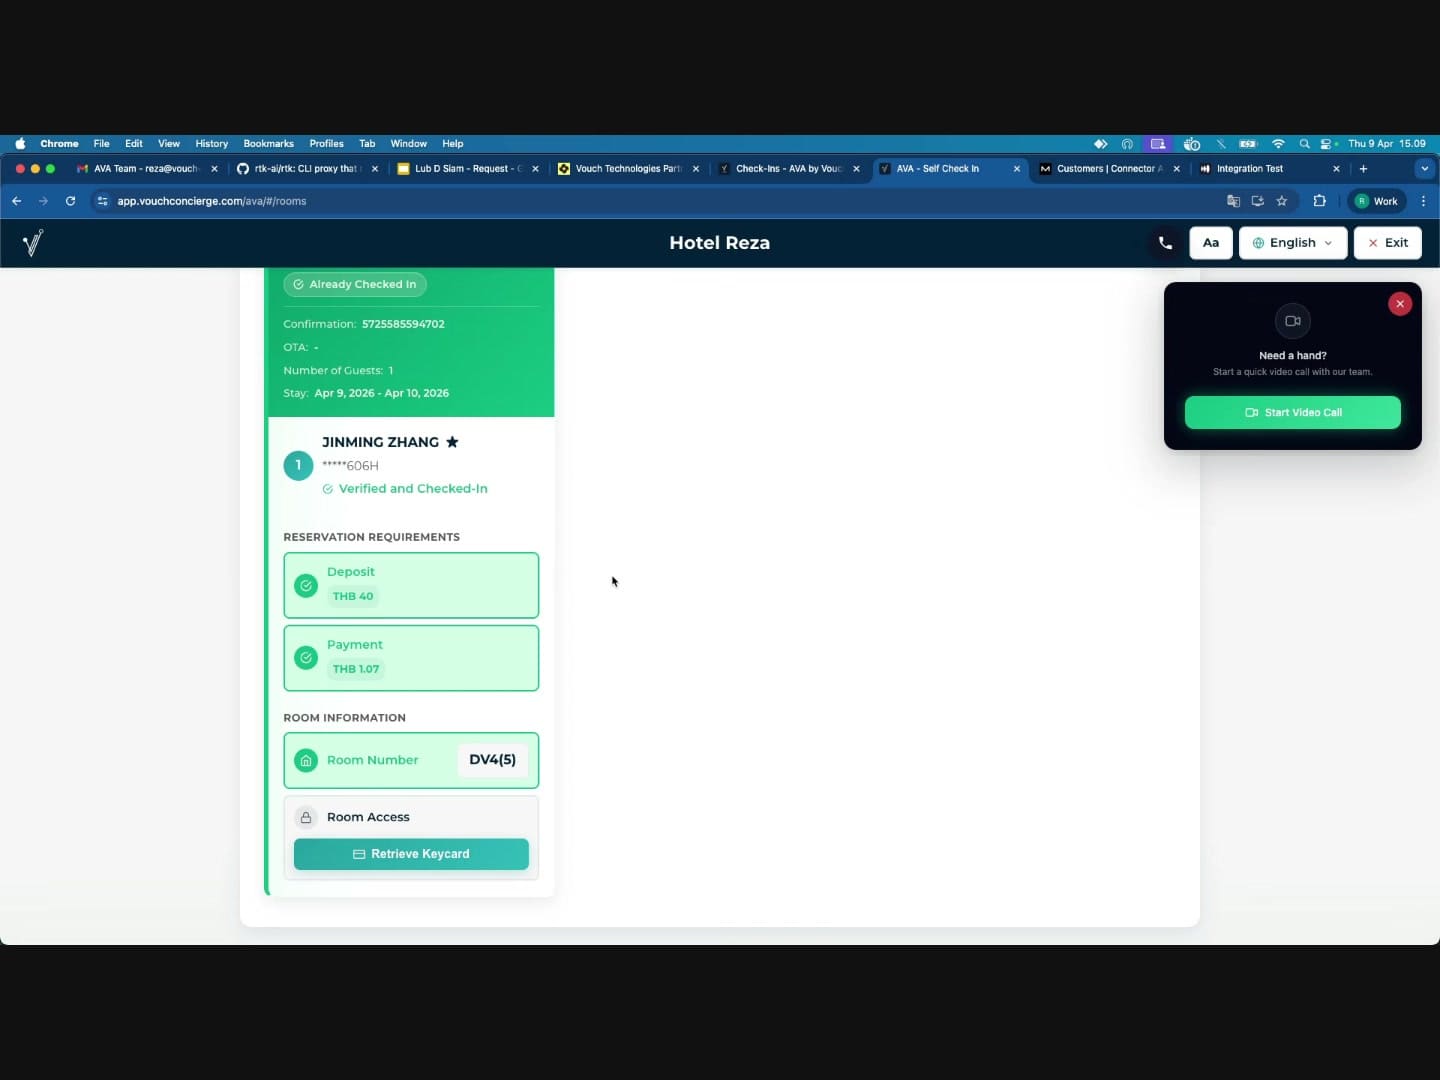
- Once payments are also completed, the system assigns a room and shows "Verified and Checked-In"
Staff Workflow
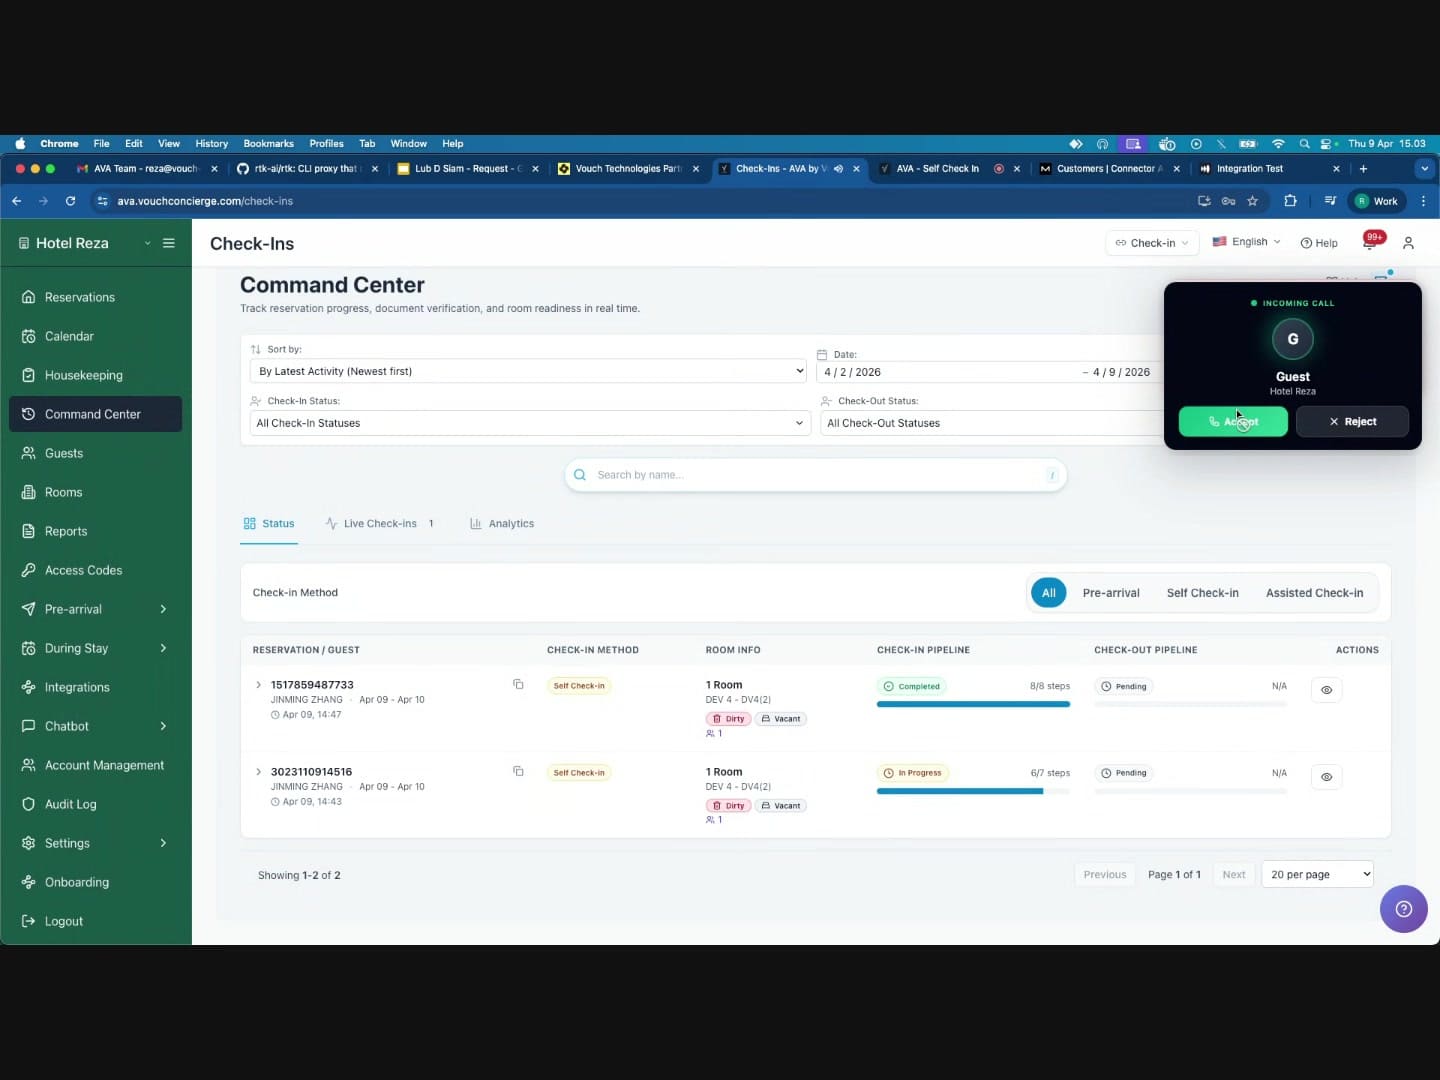
1. Receiving a Video Call
When a guest initiates a call:
- You will receive a push notification: "Incoming Video Call -- A guest is requesting a video call"
- The call widget appears in the top-right corner of the Command Center
- Click the notification or the widget to accept the call
- Once connected, the widget shows "Connected" with the guest's camera feed (if enabled)
While the call shows Connected, navigate to the guest's reservation in the Check-Ins table. The override actions appear as soon as the row is eligible and the call is live.
2. Travel Document Override
Use this when the guest's passport or ID document upload has failed or needs manual approval.
When to use: The guest uploaded their document but it was not automatically verified (e.g., poor image quality, unsupported document type, OCR failure).
Steps:
- In the Check-Ins table, find the guest's reservation and expand it
- Click the override action for the document upload step
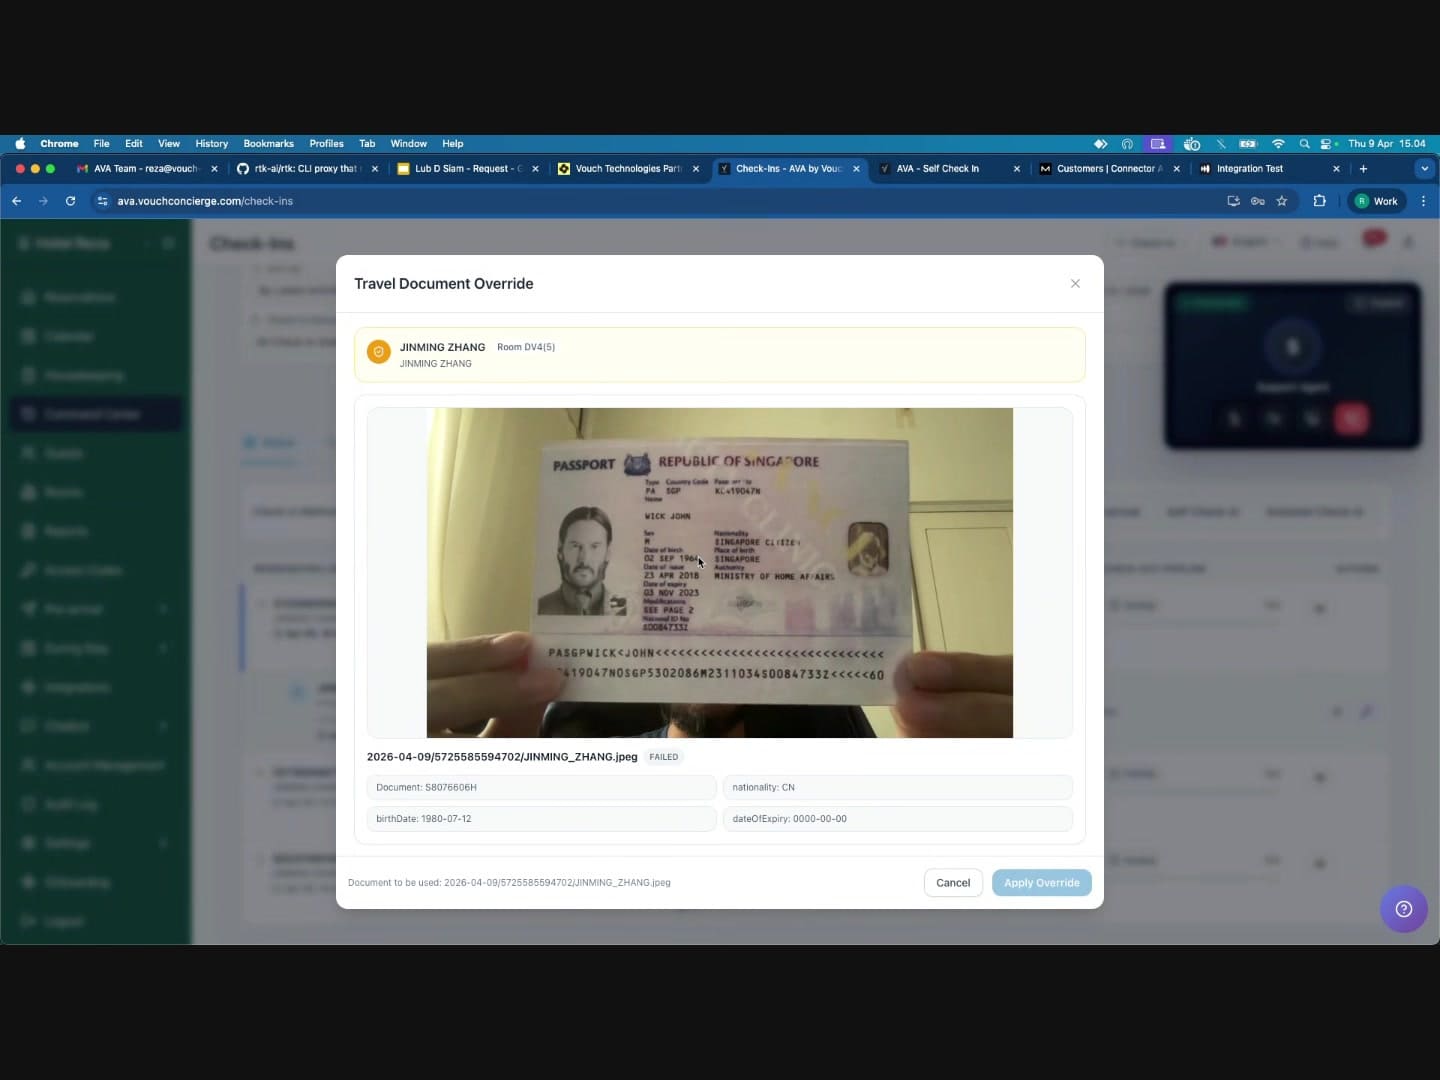
- The "Travel Document Override" modal opens, showing:
- Guest name and room number
- A preview image of the uploaded document (passport, ID, etc.)
- Extracted fields: document number, first name, last name, nationality, birth date, expiry date
- Review the document image to confirm it is legitimate
- Enter an Override reason (required, max 500 characters) -- e.g., "Document verified visually via video call, OCR failed due to glare"
- Click "Apply Override"
The guest's Document Upload step will turn green.
3. Guest Registration Override
Use this when guest information needs to be filled in or corrected by staff.
When to use: The guest cannot complete the registration form themselves, information extracted from their document is incorrect, or additional fields are required (e.g., for government compliance like TM30).
Steps:
-
Click the override action for the guest registration step
-
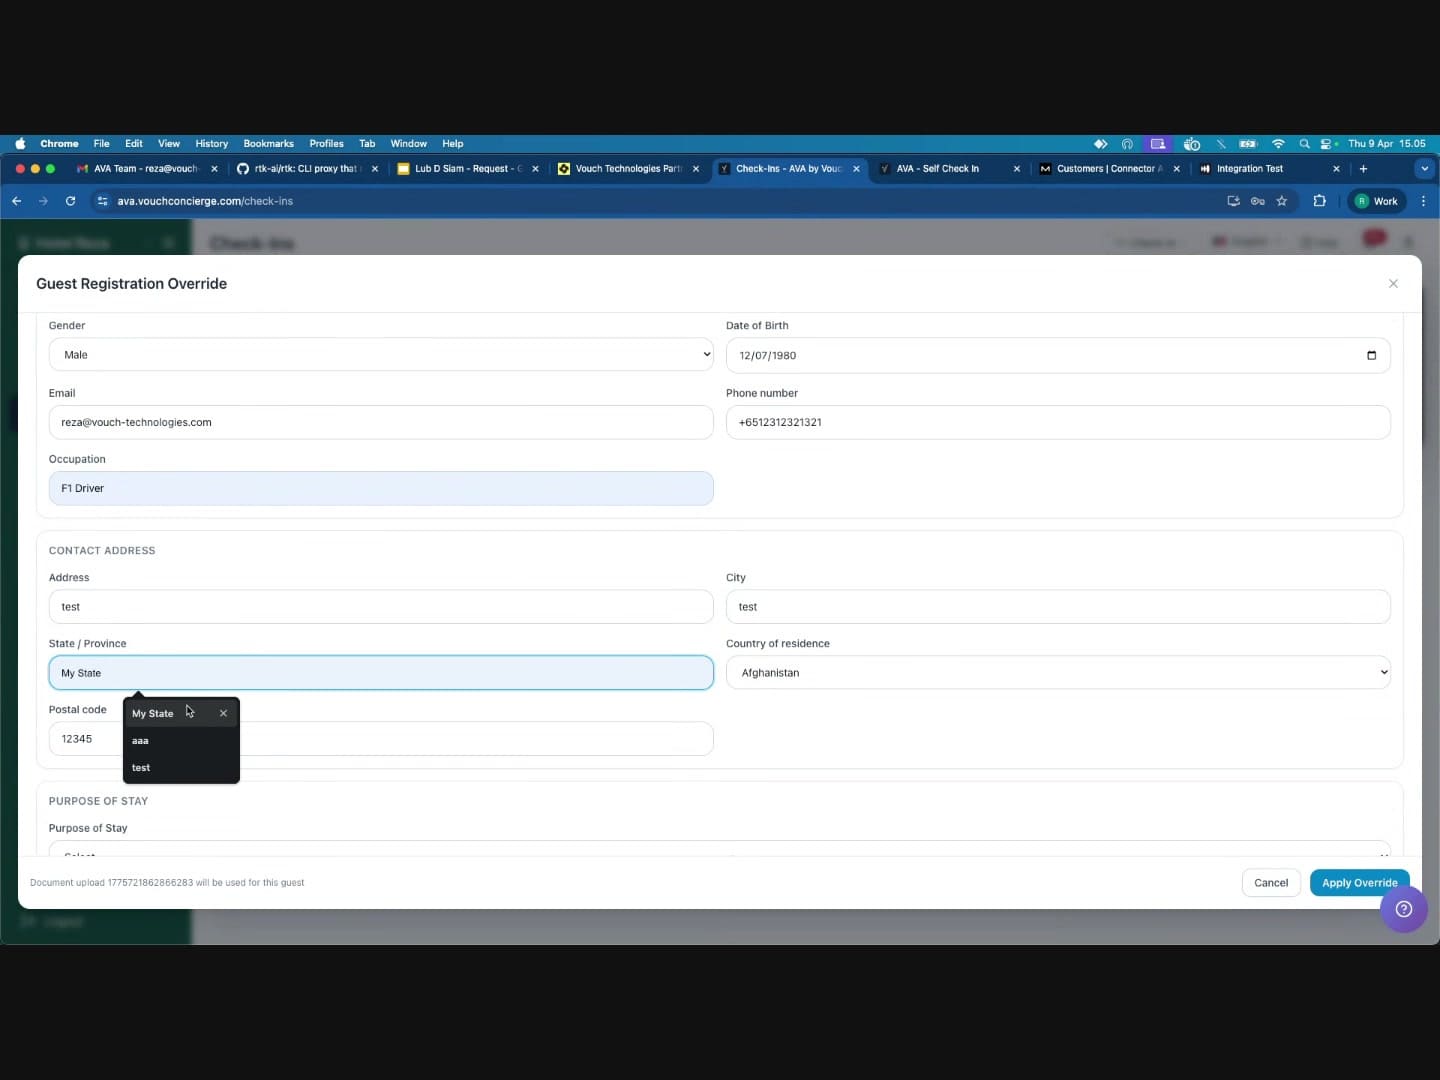
The "Guest Registration Override" modal opens with a comprehensive form
-
Review and fill in the required fields:
Basic Information:
- Salutation, First Name, Last Name
- Document Number, Nationality
- Permanent Resident / Work Permit holder checkbox
- Gender, Date of Birth
Contact Information:
- Email address, Phone number
- Occupation
Address:
- Street address, City, State/Province
- Country of residence, Postal code
Travel Details (if applicable for your property):
- Place of Departure (country, state, address) -- option to use current address
- Next Destination (country, state, address) -- option to use current address
- Estimated arrival time and Departure time
Purpose of Stay (dropdown)
-
Enter an Override reason at the bottom (required, max 500 characters)
-
Click "Apply Override"
The guest's Guest Information step will turn green.
4. Facial Verification Override
Use this when the guest cannot complete the facial verification step.
When to use: The facial recognition camera is not working, the guest's face does not match due to appearance changes, lighting conditions are poor, or the guest has a disability preventing them from completing the step.
Steps:
- Click the override action for the facial verification step
- The "Facial Verification Override" modal opens showing the guest name and room number
- Visually verify the guest's identity through the video call -- compare their face with the uploaded document photo
- Enter an Override reason (required, max 500 characters) -- e.g., "Guest identity confirmed visually via video call"
- Check the confirmation box: "I confirm the guest has passed facial verification and this step should be marked valid."
- Click "Mark facial verification as valid"
The guest's Facial Verification step will turn green.
After all four verification steps are overridden or completed by the guest, the status changes to "Verified":
5. Deposit Payment Override
Use this to mark the deposit as paid without processing an online payment.
When to use: The guest paid the deposit in cash, by card at the front desk, or the deposit has been waived.
Steps:
- Click the override action for the deposit payment
- The "Deposit Payment Override" modal opens showing:
- Guest name and room number
- Instructions to mark the deposit as paid after confirming the override reason
- Enter an Override reason (required, max 500 characters) -- e.g., "Guest paid deposit in cash at front desk"
- Check the confirmation box: "I confirm the deposit payment should be marked as paid."
- Click "Mark deposit as paid"

The guest's Deposit step will turn green.
6. Room Payment Override
Use this to mark the room payment as paid without processing an online payment.
When to use: The guest paid the room charge in cash, by card at the front desk, payment was pre-arranged, or the charge has been waived.
Steps:
- Click the override action for the room payment
- The "Room Payment Override" modal opens showing:
- Guest name and room number
- Instructions to mark the room payment as paid after confirming the override reason
- Enter an Override reason (required, max 500 characters) -- e.g., "Room payment collected at front desk via card terminal"
- Check the confirmation box: "I confirm the room payment should be marked as paid."
- Click "Mark room payment as paid"

The guest's Payment step will turn green.
How Overrides Reach the Guest
When you apply an override in the Command Center, the guest's check-in page automatically refreshes within a few seconds. The guest does not need to reload the page or take any action -- the completed steps will appear as green checkmarks on their screen in real time.
This means you can guide the guest through the process step by step during the video call, and they will see each step resolve as you apply the overrides.
Completing the Check-In
Once all required steps are completed (either by the guest or via staff overrides):
-
All verification steps turn green -- the guest's status changes to "Verified"
-
All payments turn green -- if deposit and room payment are both resolved
-
Room assignment begins -- the system shows "Assigning Room -- Allocating your room"
-
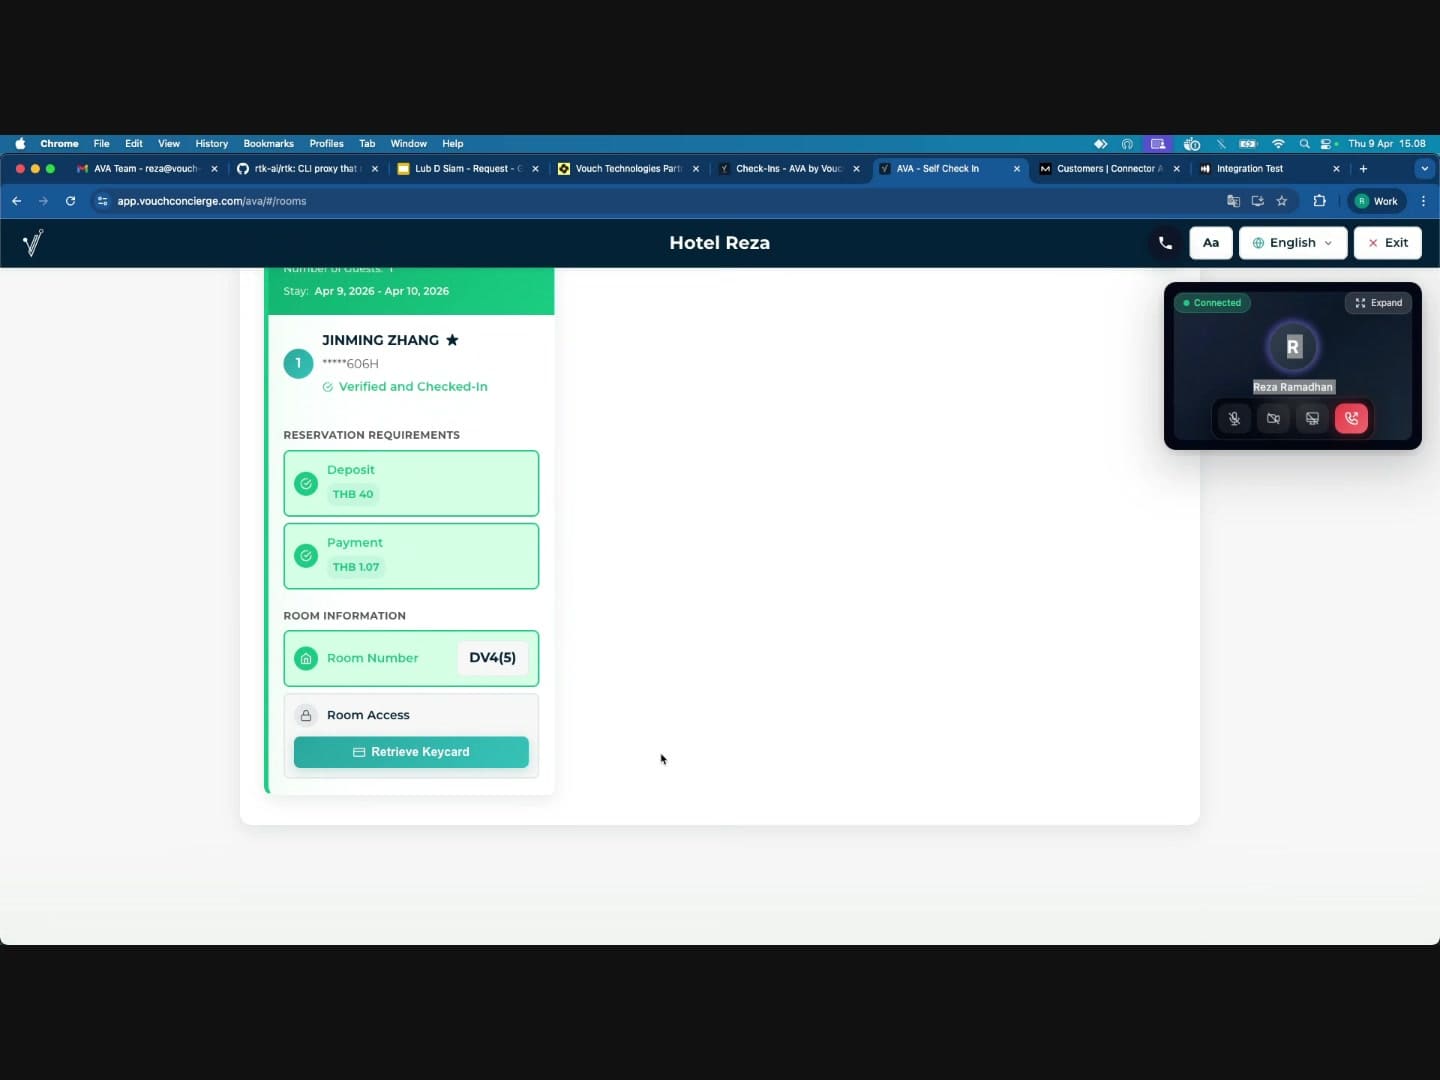
Check-in completes -- the guest sees:
- Status: "Verified and Checked-In"
- Their assigned Room Number
- A "Retrieve Keycard" button (if keycard encoding is configured)
- Room Access information (if smart locks are configured)
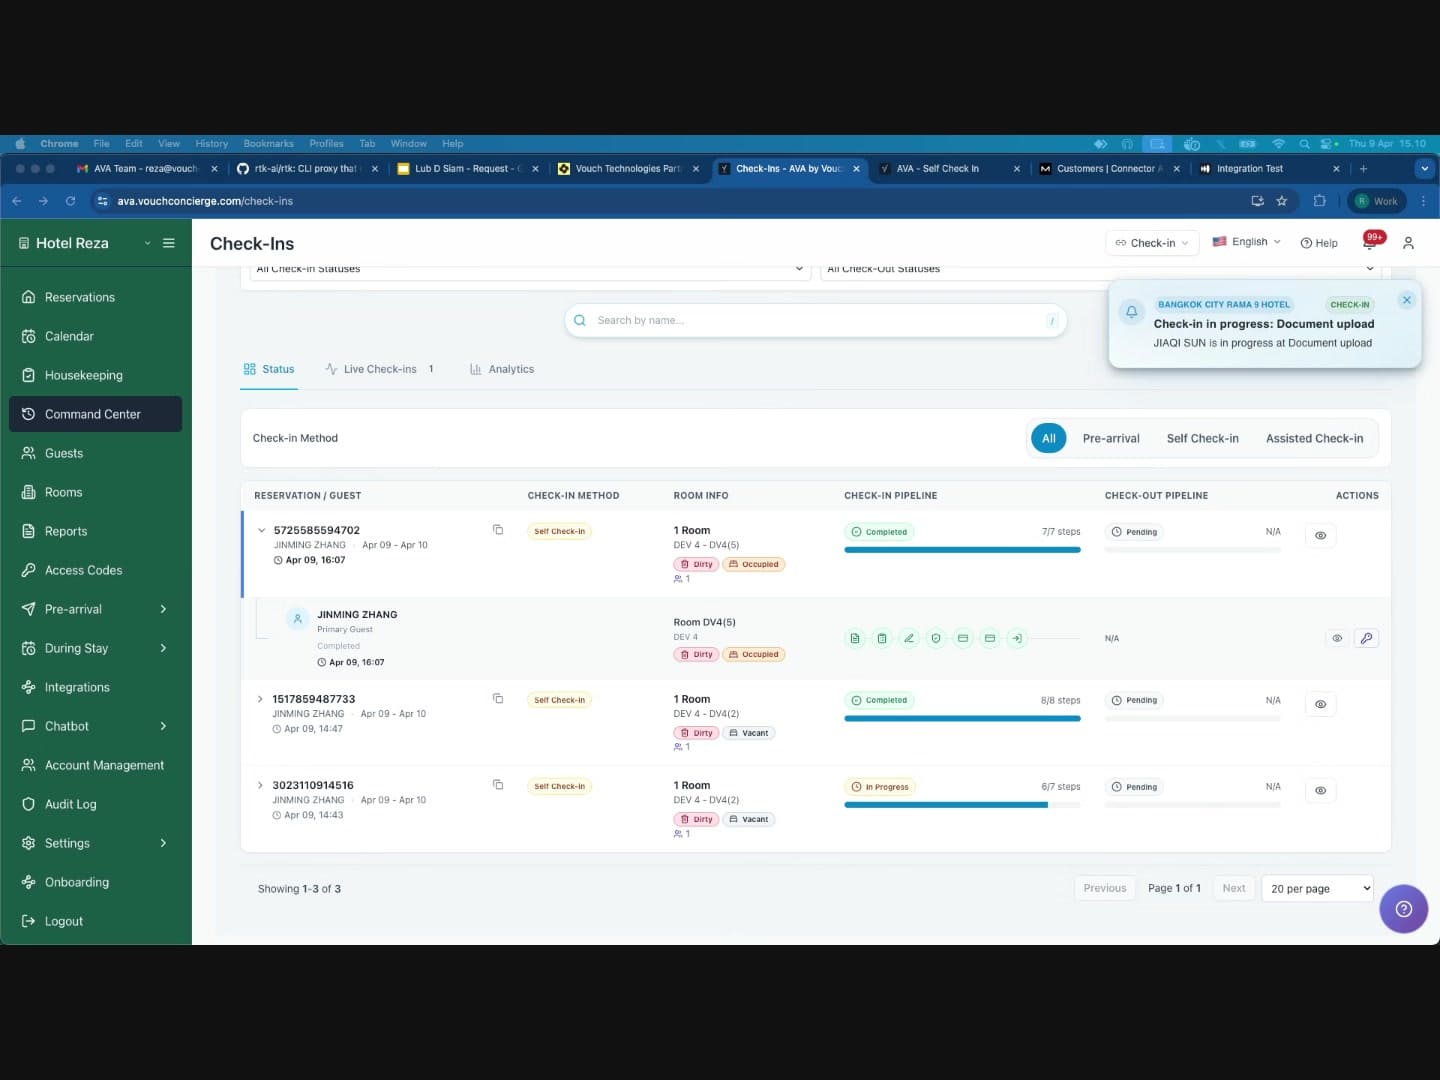
-
In the Command Center, the reservation status updates to "Completed"
You can now end the video call. The guest's page will show the "Need a hand?" widget again in case they need further assistance.
Tips and Best Practices
Writing Good Override Reasons
Override reasons are logged for audit purposes. Write clear, specific reasons.
- Good: "Guest passport verified visually via video call. OCR failed due to glare on lamination."
- Good: "Deposit of THB 40 collected in cash at front desk. Receipt #1234."
- Bad: "testing"
- Bad: "ok"
General Tips
- Stay on the call while applying overrides. If the call disconnects, you will not be able to submit any overrides until a new call is established.
- Work through steps in order: Document Upload first, then Guest Information, then Signature (guest does this), then Facial Verification, then payments. This matches the natural check-in flow.
- Let the guest complete steps they can: Only override steps the guest genuinely cannot complete. For example, the guest should sign their own signature if possible.
- Verify identity carefully: Before applying a Travel Document Override or Facial Verification Override, confirm the guest's identity through the video call by comparing their face with their document photo.
- Check the reservation in Command Center: After all overrides are applied, confirm the reservation shows as "Completed" in the Check-Ins table.
- Multiple guests: If a reservation has multiple guests, each guest's verification steps need to be completed independently.
Troubleshooting
| Issue | Solution |
|---|---|
| "Apply Override" button is disabled | Ensure the call shows Connected, enter an override reason, and check any required confirmation boxes |
| Guest's page does not update after override | Ask the guest to wait a few seconds. If it still does not update, ask them to pull down to refresh the page |
| Video call will not connect | Check that Video Calling is enabled in Settings → Communications → Video Call. Ensure your browser allows notifications and camera/microphone access |
| Override fails with an error | Read the error message displayed in the modal. Common issues: the check-in session expired, or another staff member already applied an override for that step |
| Guest cannot find the call button | Direct them to look for the phone icon in the top header bar, or the "Need a hand?" floating widget |
Still Stuck?
Contact success@vouch-technologies.com if:
- ❌ The call stays disconnected after you retry
- ❌ Override buttons remain disabled while the widget shows Connected
- ❌ The modal shows an error you cannot clear by refreshing
Include the reservation number, the step you tried to override, and a screenshot of the call widget.